What I Did Over Summer Vacation – BTS
I knew I would be taking the summer off to spend with the kids. While I was probably over ambitious at the onset about what activities we would do over the summer, one thing I knew for sure was that I wanted to do a video with them. It’s something I’ve been thinking about almost since the moment they were born.
Not only would it give them something to enjoy and relive for years to come, it would keep me practiced and allow me to push a few boundaries for myself. It was also a good test of how far you could push an iPhone when all you have is an iPhone. I was both pleased and disappointed with my iPhone only experience. More on that later.
So with a loose plan, iPhone 6s Plus and plenty of time on our hands, we set out to make a summer music video. Here are some of the BTS details and lessons learned.
Music Choice
What really got things going was that the new song by Justin Timberlake, Can’t Stop The Feeling, came out in early June. I played the music video for the kids which has a lot of freestyle dancing and they really liked it. From there it was easy to start coming up with a simple idea for shooting.
Because this was our first pre-conceived video I wanted to keep it simple, make it fun and keep them interested in the process. I decided the best way to approach it was to do the first shoot at home in the yard and then edit the first 20-30 seconds of the video so that they could see how they looked. This ended up being a great idea because with each shoot and new edit they became more invested in the project. They probably watched 4 different versions of it before the final version was complete.
Here is the very first cut I showed them.
Version 1 after 1 day of shooting.
What’s funny is that on the first shoot when I explained what we were going to do out in front of the house, they all got nervous. They looked at each other and kind of giggled when I asked who wanted to go first. Finally, Maximus volunteered to go first, which kind of shocked me. But he put himself out there and took direction well.
I used a bluetooth speaker (the original Jawbone Jambox) connected to an iPad to play the music as loud as I could (which was not loud enough in most cases) while he danced. The other two watched closely and got a good idea of what the process was like.
On this first shoot I did the entire song once with each of them, and then one more time in a group shot.
Locations
As I mentioned our first location was at home outside. We just picked a few different places around the house and yard and I shot each one alone first and then all together at the end.
That gave them a level of comfort that helped us go to other locations beyond the safety of home. After the first shoot I think they mystery of “what are we going to have to do” was solved and they were comfortable with the process.
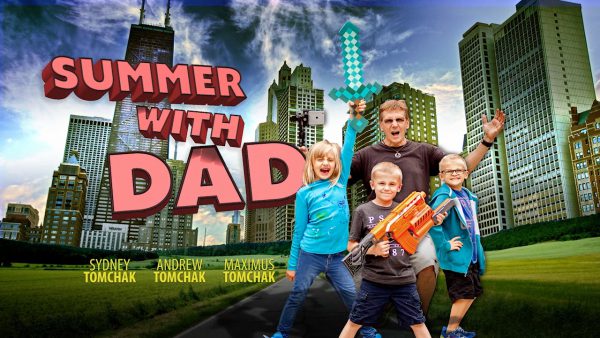
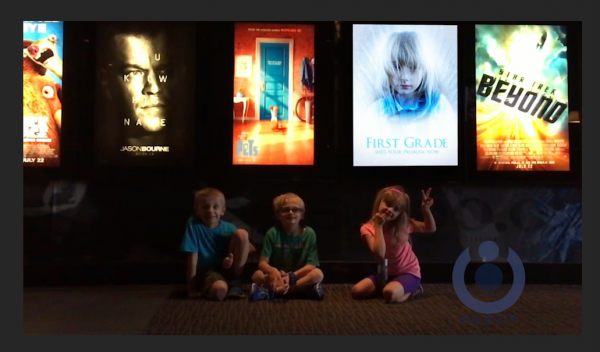
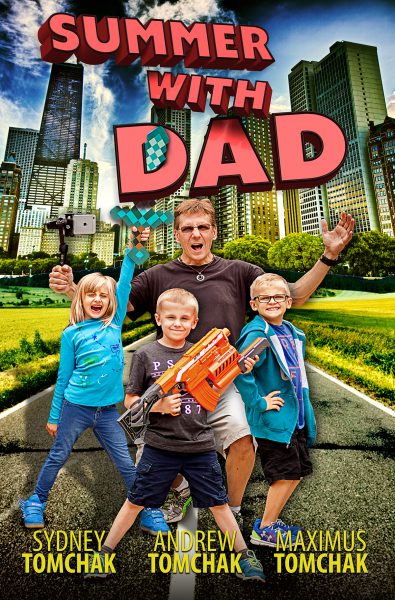
Our second location was Northside Park in Wheaton. This time we were in a more public area and with other kids around. And people were paying attention too. I mean, we had a small speaker playing music and a crazy dad running around with a handheld gimbal (you can see me holding it in the movie poster image). At one point while Andrew as dancing on the top of the slide some kids came up and just started asking what we were doing in the middle of the song.
Kids just walking through the shot.
We made a special trip to Chicago’s Millennium Park just a few days before school started up because I realized I had no shots that represented Chicago. That seemed like a glaring omission. That was probably the ultimate in testing their ability to dance in public.
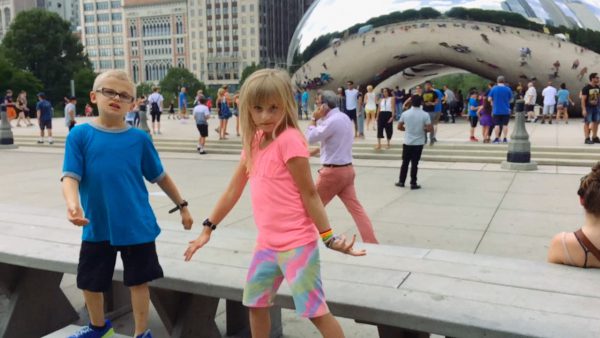
The shot of Max and Sydney dancing on the picnic table in front of the bean was supposed to be just Sydney, but she didn’t want to do it until Max said he would do it with her. And even with that, I had to do it first and show her that it was “no big deal” and that “nobody is even watching”.
Trying to convince Sydney to dance in front of the Chicago Bean.
The trick that day was to have a plan and execute it quickly before they became too self conscious. But at that point I was pretty practiced at knowing what I needed to get so we were able to get all of the shots in about an hour.
The driving shots where the camera is looking into the vehicle at the kids was shot while driving around Wheaton for about 20 minutes. I would play the full song with the camera on one side of the truck and then pull over and move it to the other. Max was in the middle and kind of missed out on his CU shot on that one.
Aside from that I just made sure I was always looking for opportunities while we were out during the summer. There was always an opportunity to record something and that was one of the amazing things about using the iPhone as my camera. It was always with me, and I needed nothing extra to use it on the spur of the moment.
Slow motion outtakes.
One unexpected moment was when we went to a local park that had a water fountain for the kids to play in. I decided to play with some of the slow-motion frame rates on the iPhone to find out what the limitations were. Those unplanned shots were some of my favorite in the video. I originally had a lot more of them in the video but as the summer went on and I had more and more new shots to add to the video I had to remove them to make room for others. I think there’s only one or two left now.
One technical note – there is some slight frame jumping in the slow-motion video. This turned out to be a bug at the time in the Filmic software I was using. Recording with the iPhone app never produced this problem. The bug has since been fixed in the Filmic app. I’d like to think I helped make that happen since I did write to them and send them some sample video shots too.
Editing and VFX
Editing with Adobe Premiere
Normally I edit the family videos with FCPx. It’s a very fast and capable editor and I can normally knock out the videos in record time. However, the newest version (2015.3) of Adobe Premiere had just been released the same week that I started shooting and included a new Proxy feature. So I figured this was the perfect project to try test drive the new version with. I knew I would be shooting mostly iPhone and I also know from experience that raw movie files from the iPhone can be difficult to work with, not to mention the constant sync issues due to it using a variable frame rate for recording.
The new proxy workflow worked great and made editing so much more responsive. One great feature is that anytime you render out the timeline, it automatically uses the full resolution master files instead of the proxy files. So it’s kind of the best of both worlds.
I modified the proxy setting to include a watermark in the lower right corner so that I always knew if I was looking at the proxy vs. the original. It’s just a single keystroke to toggle between them.
The process was pretty simple. We planned one shoot a week to dance somewhere while I recorded it, and the kids help pick the locations that they thought would be best. All of the other activities that were done over the summer were recorded on my iPhone and copied off daily so that I could work with the footage.
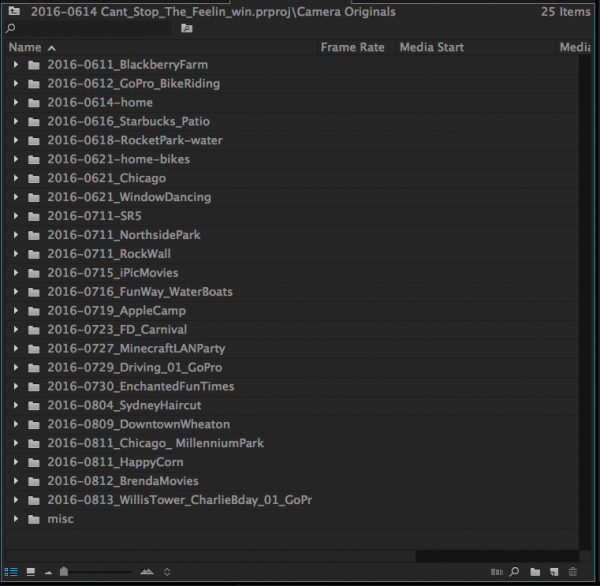
Taking a little extra time up front to organize goes a long way when you’re looking for something specific.
I created a new cut of the video each week using the most recent footage and let the kids see it. I think this ended up being a great idea because it kept them interested in the project by showing them the results of their work. It also kept them thinking about different things they wanted to do in the video.
After Effects
I wanted to push into some areas that I have not had a lot of experience with, so I decided to work with the camera tracking module and insert some 3D objects into 3 of the scenes. The most obvious place to do that was in adding their names while they were dancing.
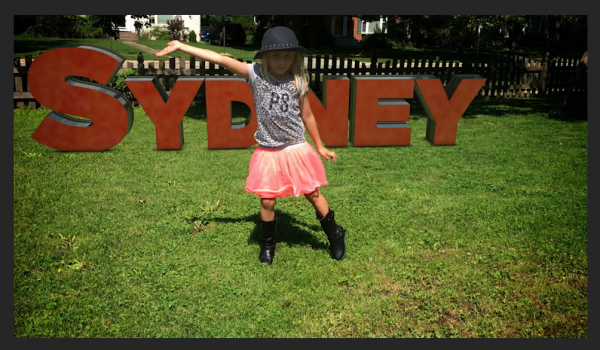
After watching this short tutorial on YouTube about camera tracking in AE, I started working on my first one, Sydney.
This was probably the most difficult one to do, and in the end it still wasn’t perfect. But I did learn a lot about the process that helped me do the other two much quicker. For Sydney’s name I used Element 3D to create the text and was impressed with it overall when I was done. After all, it was my first attempt at it. I was even able to have the trees and sky from the shot reflected in the text.
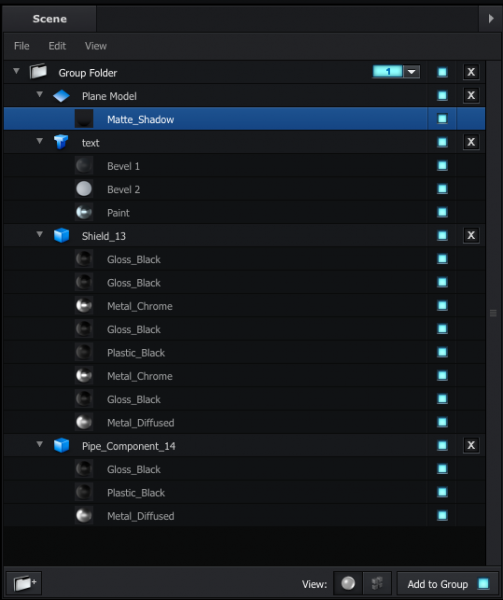
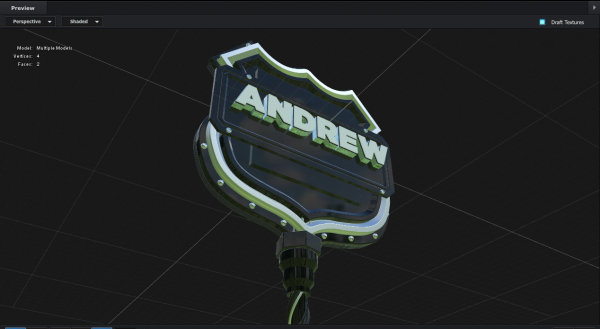
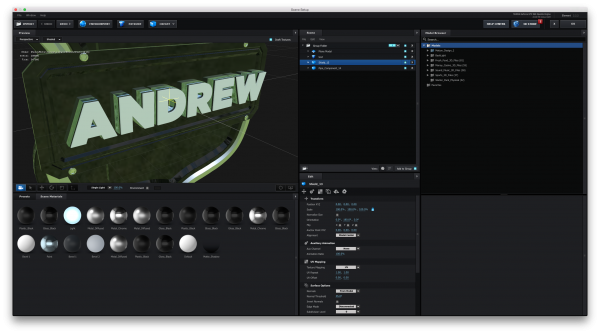
I also used Element 3D for Andrew’s title, but tried to do something different. I used one of the model kits I had to build a sign from a shield and metal pole, and then added his name to it with extruded text.
The last one was the easiest since it was just 2D text. But I wanted it to look like the name was painted or burned onto the grass similar to a football field.
There were other VFX I had planned as well, but as with most projects you end up with more ideas than time to execute them. Once they started school I gave myself a week to finish it up and that really didn’t allow me to start down any new paths.
 This was going to be a cool video short of 3 maxes all saying hello, one after another. But, no time.
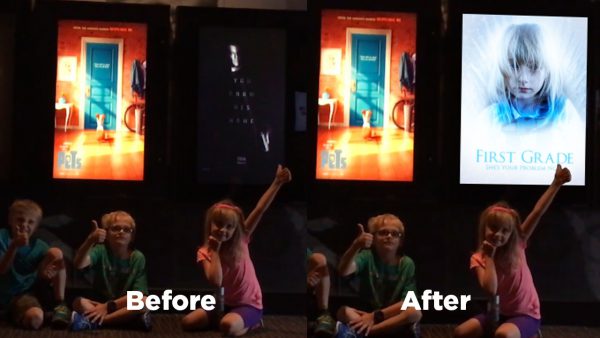
One last minute thing I did work in was inserting the poster of Sydney that I had created over the summer into the movie theater scene. I just couldn’t resist. They didn’t even catch it until they had seen in a few times.
The Poster
The day before they went back to school it hit me that I probably needed a movie poster too. We already have a few others and the kids seem to really like them.
I had no real idea what I wanted to do, but I knew I would need each of them in some kind of hero pose. I also knew (based on lots of experience) that I would have a better chance at winning the lotto while also getting struck by lightning at the same time than getting all of them in the perfect pose at the exact same time.
So the day before school started I dragged each of them into the driveway where I setup a blue sheet on a stand and took various photos of them posing in front of it. I photographed them one at a time and let them do multiple poses so that I would have a few different ones to choose from. Plus, I still had no idea what I was making so I needed to have options.
Once I looked through what I shot, I narrowed it down to the photos above.
The next step was to cut them all out so that they could be combined into a group pose. I actually had an alternate pose for both me and Max. I really wanted to use the shot of Max with the hat, but in the end it just didn’t work with the final composition.
Finally I played around with different arrangements until I had what I liked as a final group pose.
Before moving forward with some poster ideas, I took a look at a bunch of different posters from previous movies to see if any of the ideas inspired me. At this point I just had a group pose but no idea how I was going to use it yet.
I think the only obvious thing that I took away from this was the poster for “Disaster Movie”. I kind of liked the red text and that’s pretty obvious from my final poster. Otherwise these posters gave me some general ideas of what I might do.
I knew that, as much as possible I wanted to use photos that I had shot. Nothing from stock images. I also knew I wanted it somehow reflective of Chicago and the skyline.
I remembered a few years back that I did a all day photowalk with Brenda though Chicago and we took a ton of great photos of the city, so that’s where I started looking.
As it turned out I had some great background images, but nothing that I could have us “standing” on. The angles were wrong or didn’t include enough of a ground plane. That’s whet I got the idea of a road into infinity. The only problem was, I’ve never taken any photos like that. So this is the only photo that’s actually not from my personal library.
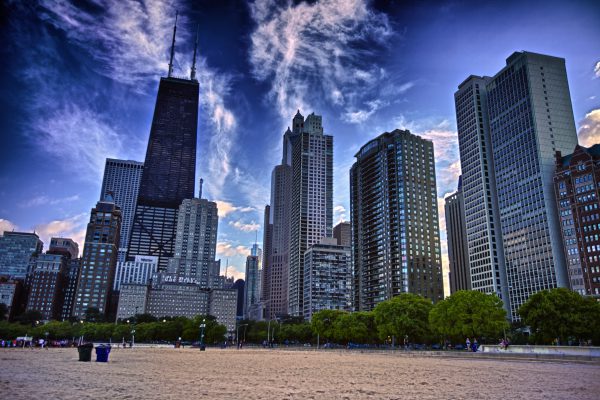
Once I had this image and I could tell it would work great as the ground, it was just a matter of finding a background that I could combine with it. In the end, this is the image I chose to go with it.
With these two images selected, it was just a matter of playing around with composition, color blending and other enhancements until I arrived at the final poster image. All in all, from start to finish I would guess it took me about 12 hours to complete the poster. However, about 4 of that was also due to the learning curve involved. Most significantly was learning how to use the 3D Type Tool inside of Photoshop for the title text. It’s a feature that I always knew was there but never took the time to learn it. It turned out to be the perfect tool for this project.
As usual, it was a tutorial at Lynda.com that helped me get up to speed fast and get back to work.
At the very end of the video I repurposed all of this work for a closing graphic animation. While most of the work was already done, it did take some time to reformat the image for 16×9 and also drop the image resolution down to 72 dpi instead of the 300 it was created at. But it was a nice way to tie it all tougher with some common elements.
Movie poster turned into closing animation using After Effects.
Challenges and Lessons Learned
In a perfect world I would have used a professional video camera for this project. Something that shoots 4k with great lowlight sensitivity. But having an iPhone with built in motion stabilization that shoots 4K is not a bad option either. In fact, I felt lucky to have a phone awesome enough to do something like this. I mean think about it; it wasn’t that long ago that saying you shot a video on your phone would have made people laugh (or dread that you might make them watch it).
So with the attitude that “the best camera to use is the camera you have” in mind, I decided to find the limits of what I could personally do with the iPhone. And over the summer I learned some great lessons. Not all of them are directly related to shooting on the iPhone itself.
Focus is Hard
Because the iPhone does not have the ability to control the aperture at all, I was stuck with the standard ƒ2.2 aperture of the fixed lens. While this is great in a lot of cases, the first problem I ran into was keeping the right thing in focus while shooting. If I used autofocus, I was never totally sure it focused on the correct part of the image. If I locked the focus on the area I wanted to keep sharp, I was very limited in what moves I could do because moving closer or farther from the subject would make the image blurry.
Poorly focused example.
And keep in mind that most of these shoots were midday with LOTS of sun beating down, so I often couldn’t tell what was in frame on the phone, let alone if focus was working or not. I’m sure I could have found some sort of hood to put over the screen or made one myself, but then I wouldn’t have been able to use the gimbal with the camera because it would have thrown the balance off.
So it was sometimes difficult to go out and shoot something only to be heartbroken later when you watched it back. What I really wanted was to open the aperture to around ƒ11 and just have nearly infinite focus. But, maybe next time. Even the newly announce iPhone 7 could not have helped with this problem. In fact it would have been worse because it has an even more shallow depth of field.
Random Side Note – Filmic Pro
A lot of the video was shot using the iPhone app FiLMiC Pro. Now this app makes you feel like you’re using a much higher end camera.
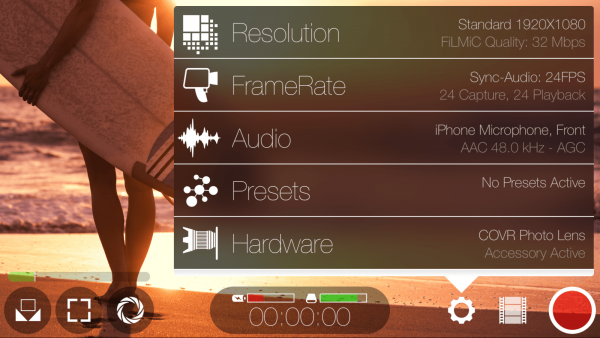
There are tons of options that it offers beyond what you get with the stock apple camera app, but the most important one for me was the ability to record 4K at 100Mbps. This creates a sharper final image with a lot less visable compression. Sure, the files are much larger but so what. And while it makes setting and locking exposure and focus easier, it can do nothing for the aperture problem.
Ultimately I could find no real solution to the focus problem, other than being hyper aware of the problem and always checking my shots when possible.
Hand Held Not Good Enough
After doing the first shoot in the front yard and watching all of the footage, it became very obvious that if I really wanted a more professional look for the dancing segments I needed to use a gimbal. No matter how smooth I thought my handheld moves were, even stabilizing everything in After Effects just wasn’t cutting it (not to mention I really didn’t want to stabilize every single shot in After Effects).
I have been researching gimbals on and off for a long time and what I really wanted was the 4K Osmo, which is both a gimbal and 4k camera. But at nearly $700 that just wasn’t an option. And the fact is, in the right conditions the iPhone camera is actually pretty awesome. So why pay for another camera, when all I need is to stabilize the shots?
I ended up getting a EVO Gimbal that works with various large size phones, including my iPhone. I spent about 30 minutes setting it up and reading the manual, and then recorded a lot of shots of them bike riding to get the hang of it. I was immediately impressed. What a difference it made.
So that problem was solved and I think moving forward I will use a gimbal a lot more regardless of what camera I shoot with. I actually just watched a great video today covering a new gimbal for DSLR cameras that looks great for the price.
If you’re curious about this Gimbal, check out this short intro video that covers all of the features and gives you a really good idea just how easy it is to use.
EVO Demonstration and Unboxing.
Group Dancing Needs Help
Again, going back to the very first shoot, it was obvious from my group shot that I needed to do something a lot more planned and possibly choreographed when it came to having them dance together. When I told them to just dance to the music, it looked like a hot mess of dance moves with the occasional butt scratch or just total lack of motion. It was hard to find anything form 4 minutes of shooting them that I could use. In the very first version of the video I did have some group dancing shots, but knew I would be replacing them as soon as I shot better footage.
Sample of dancing gone bad.
The takeaway was I had to think through what I really wanted them to do, teach them the moves and then record it. And that also played into the next lesson learned.
Playing Shorter Song Segments Helps
On my first shoot I played the whole song start to finish uninterrupted and with no real direction. But that was just too much. The more I watched back both my first cut of the video and the official music video I realized I had to break the song into smaller chunks. This would allow us to focus on just small parts of the song repeatedly until we got it right.
With this idea in mind I cut the song into various 20-30 second parts of the song and then looped them for 2 minutes. For each of those segments I had a rough idea of how I wanted them to dance to it. Or at least, I gave them some direction to start and then let them add to it if they wanted. This turned out to be a great way to do it.
Repeating the same moves until we got it right.
I loaded the new shorter music cuts onto the iPad (what I was using for playback while shooting) and then just picked the cut I wanted. I think this one change alone made the biggest difference in getting a better performance out of them. Especially when it came to the few group dancing shots I did.
Shooting in 4K Is Awesome
One of the best benefits of shooting in 4K for this video was that I was mastering in 720. I intentionally did this so that my 4K image would have a lot of extra resolution to blow up and/or reframe any given image. And doing that without losing any video quality is pretty amazing. I remember when using an ADO or A-57 would give you at best a 3% larger image before is started to look soft. I was often going over 200% with no loss of quality. Awesome.
In this one example, both of these shots are the same shot, but because I had the extra resolution I was able to “punch in” on the image. The result makes it look like I had a long lens or a second camera.
I probably could have gotten away with editing in 1080 but I knew some of the high frame rate video (hfr) would have to be shot at 720p, so I wanted to make sure that my worse case was using video at 100%, and not more.
The Video
We ended up with a great video!
Was it exactly what I wanted? No.
Did I feel like it was actually complete? No.
But as the saying goes, “A creative work is never actually done, it’s just abandoned at some point”. Don’t get me wrong, I love the video and had fun doing it. I spent all summer on it but alas it was time to move onto other projects. Maybe even a few that pay $$.
Final Video
Download YouTube Master
Download High Bitrate Master
Download AppleTV Version
Also available on Vimeo.
Summer with Dad, 2016 from Cre8ting, LLC on Vimeo.











You must be logged in to post a comment.